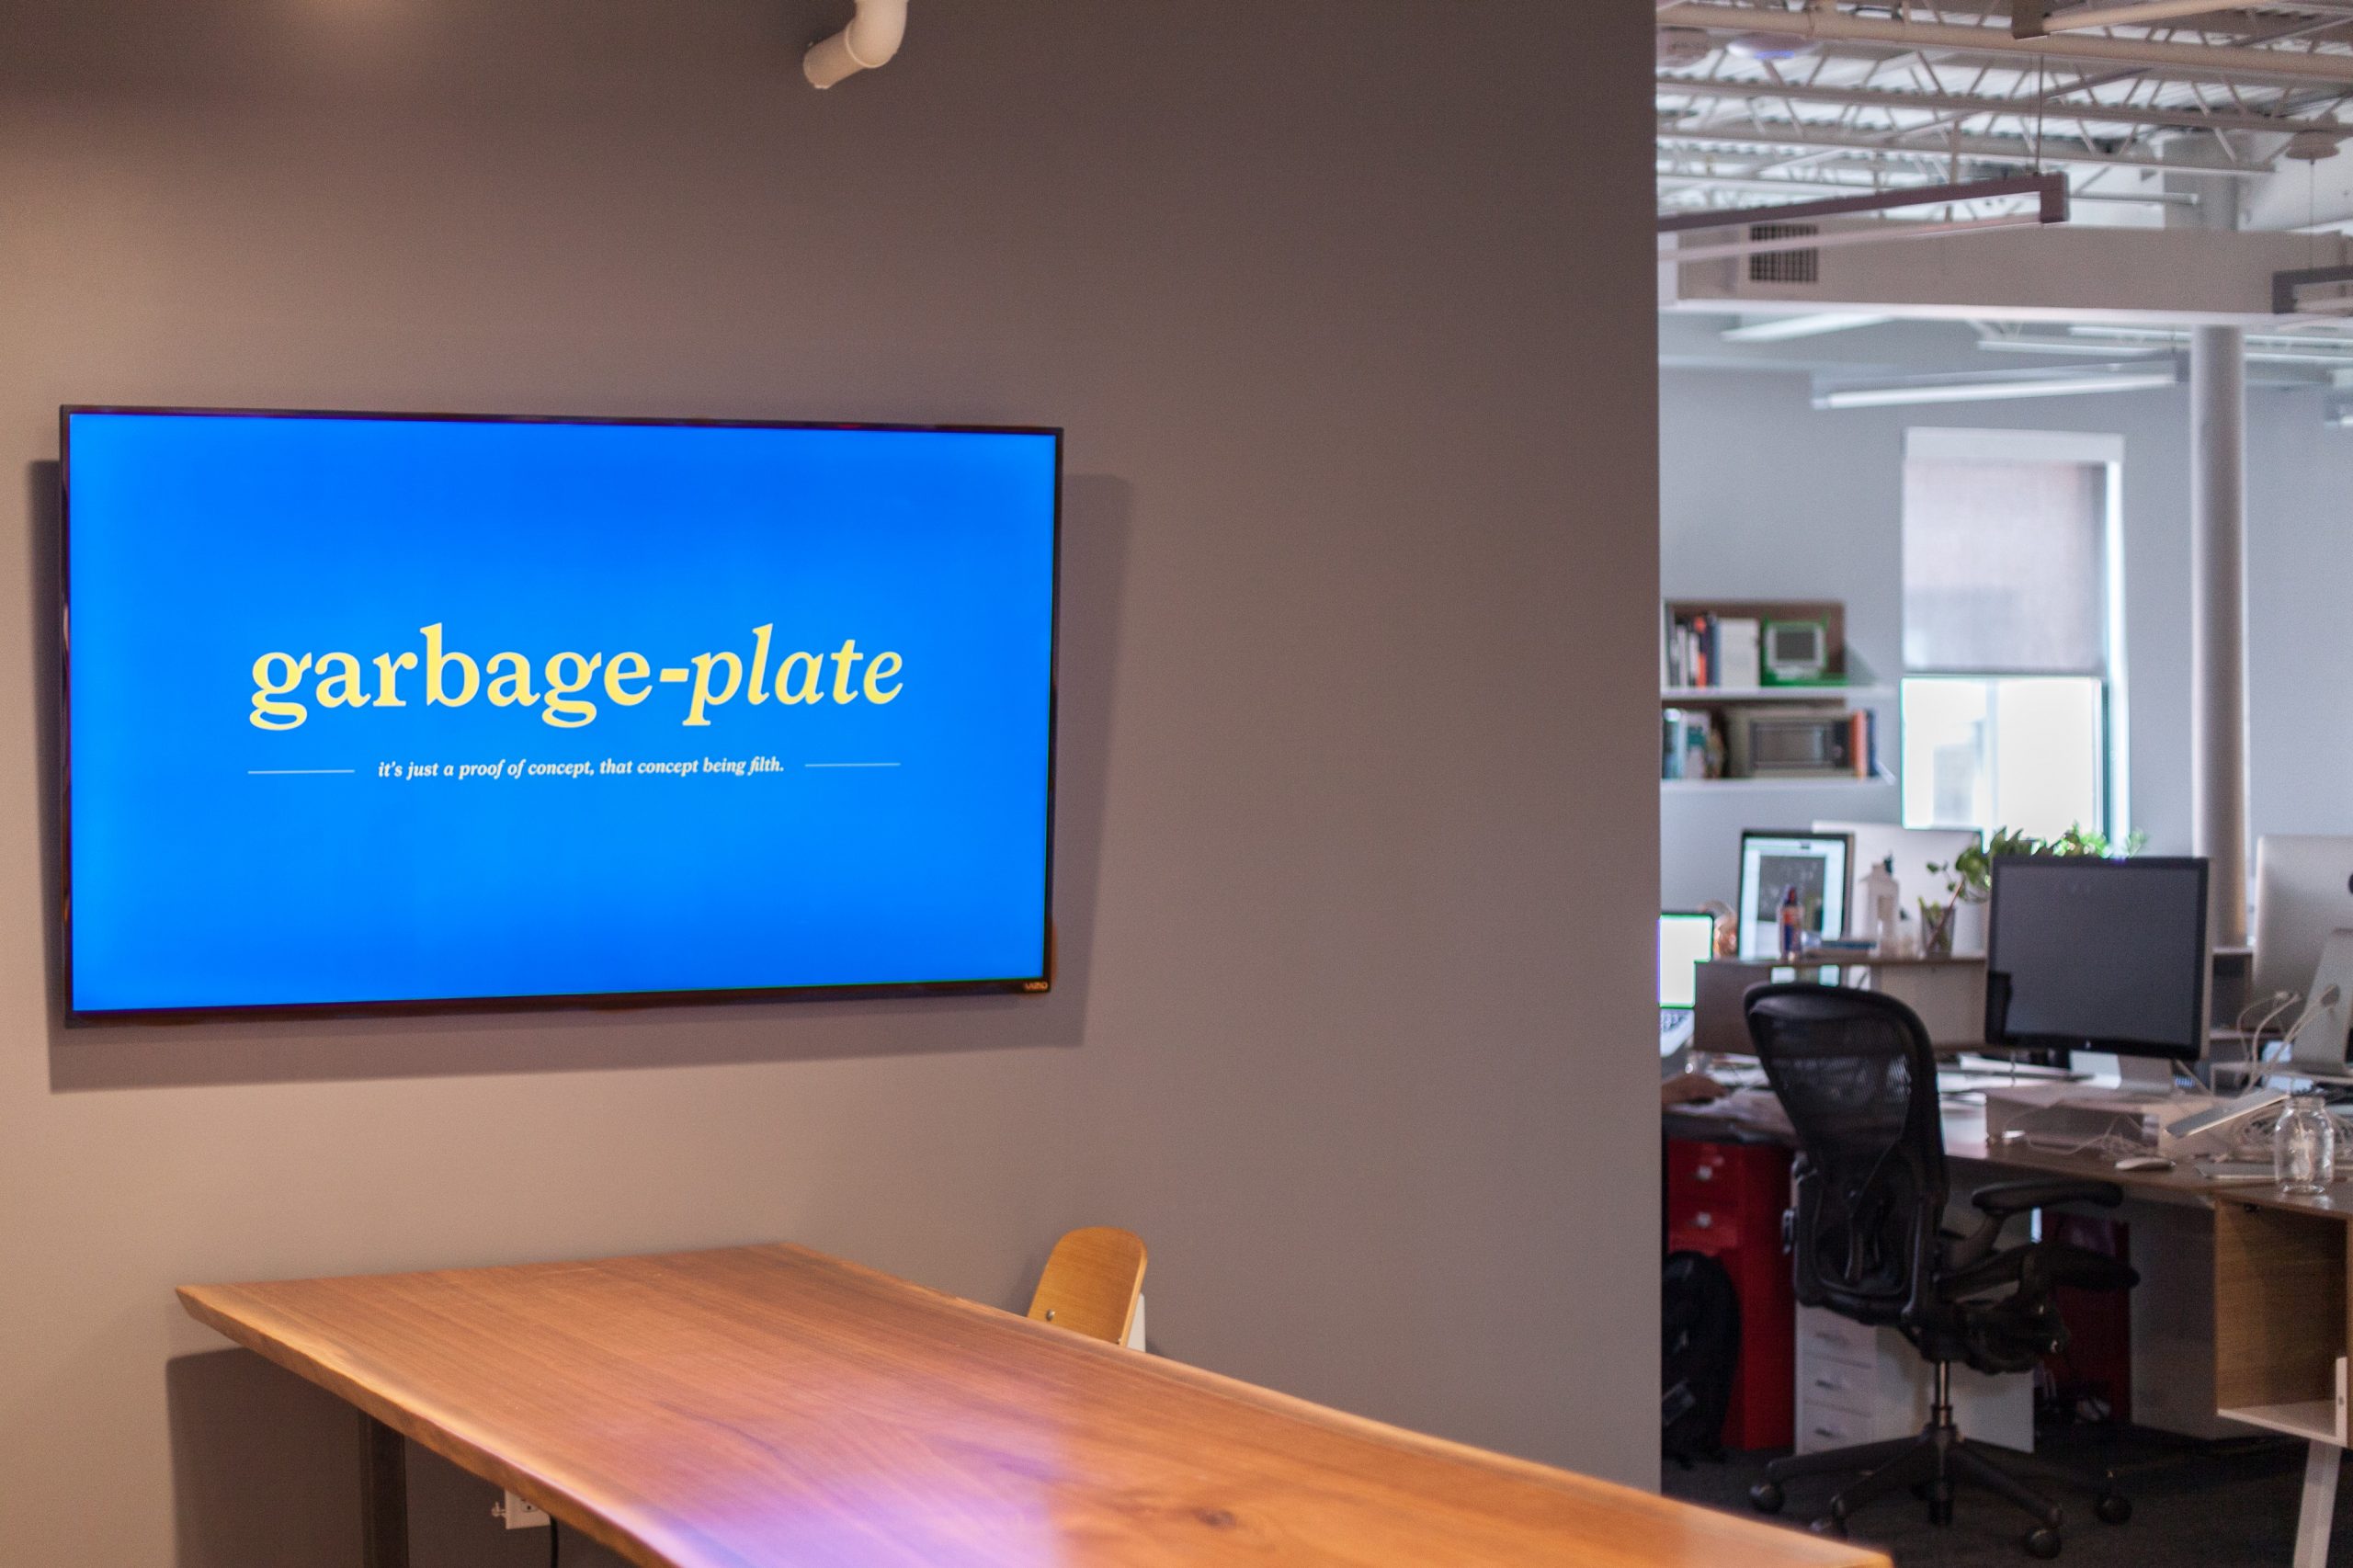
For the recent Upstatement Tankathon hack days, our team worked on something we call Garbage Plate. The idea was to build something that could bring some of our digital inspiration into our physical studio, getting things off of our individual computers and into the public space.
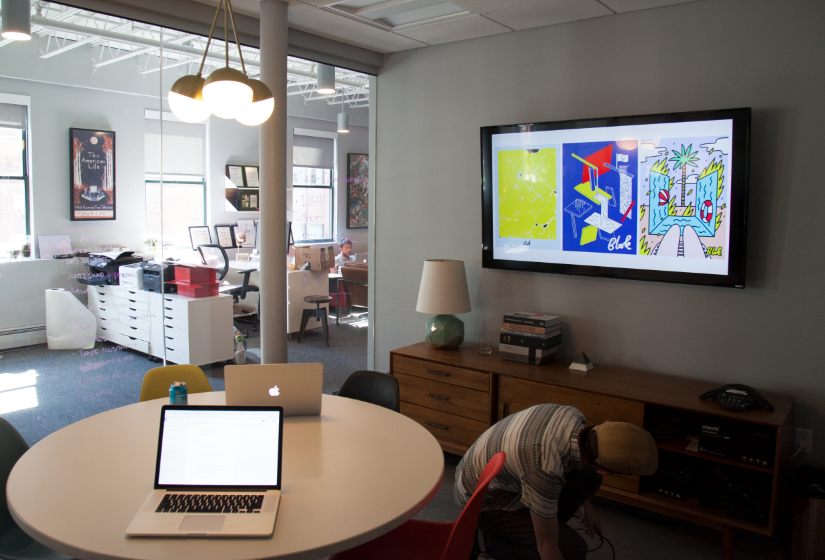
It was a team effort, with Emma Gardner and Andy Rader designing and building the app, Matt Lee and Kate Boudreau designing the graphics, and myself figuring out how to get it on the screens in the office.
This seems like it would have been straightforward, and there are a bunch of tutorials and forum posts out there about how to do this with a Pi, but they’re all out of date and none of them worked exactly right for me. So in building this, I documented the steps so that others can do it and it’ll be a bit easier.
Step 1: get a Raspberry Pi
With Micro Center just over the river in Cambridge, I went on a field trip and bought three Raspberry Pi 3 kits that came with most of the stuff I needed. These were made by MCM and came with a Pi 3, an SD card, a case, an HDMI cable and a power supply. I already had a keyboard and mouse, but if you don’t have these, get some as you’ll need them to configure the Pis.
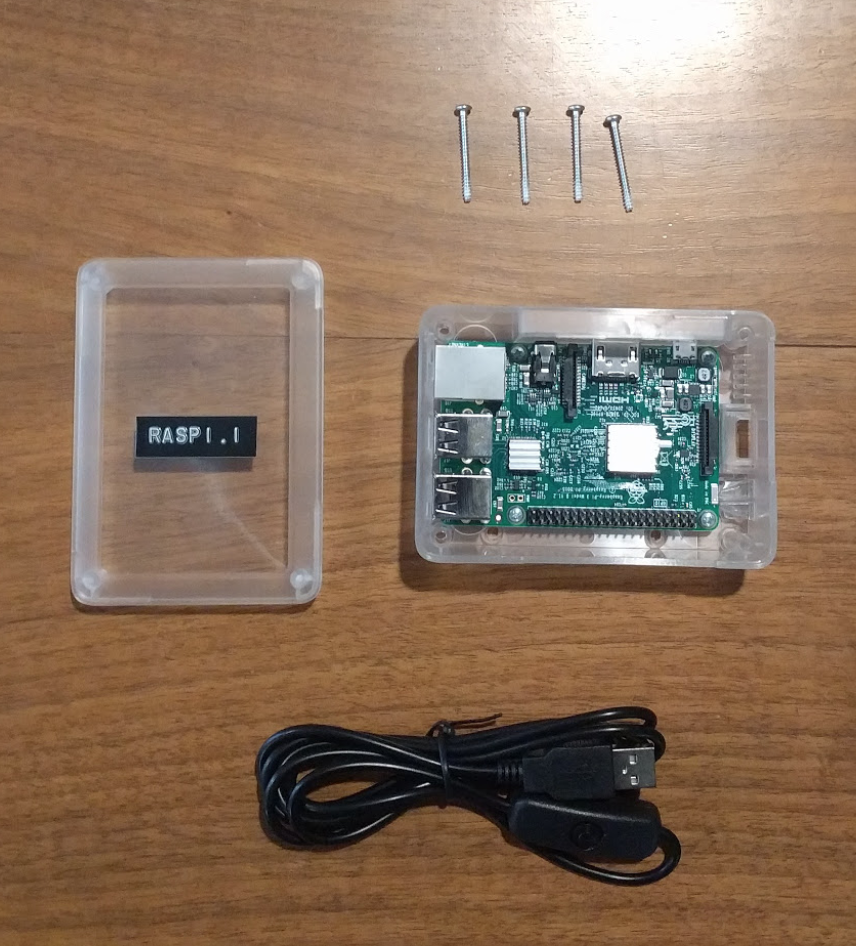
I also bought three USB power supplies with an on/off, three heat sink sets (as they’ll be on all day) and some velcro to stick them to the back of the TVs. I labeled mine while I was setting them up so I would know which is which.
Step 2: set up the environment
By default the Pi 3 with Jessie will boot into the GUI. Leave this setting alone. If for some reason yours did not boot into the GUI, run
sudo raspi-configand set it to boot to desktop.
From the desktop, you’ll want to connect to the internet so that we can download the software we need. The Pi 3 had WiFi out of the box and detected my SSID, which was a treat. I have an older Pi that I use as an internet radio, and it needed a WiFi dongle taking up one of its 2 precious USB slots and an act of congress to set up. Strongly recommend the Pi 3 on this alone.
Bonus, if you don’t want to set this all up using the Pi itself, you can SSH into the Pi from your computer. Using a Mac, you just run
ssh [email protected]using whatever your Pi’s local IP address is. The default password is `raspberry` or whatever you set it as when you set up your Pi. To find out your Pi’s IP, run
ifconfigfrom the Pi’s command line and note the IP address next to the `wlan0` summary. It was the last one in my list.
Step 3: install Chromium-Browser
This is the part that kept tripping me up. I kept following tutorials that asked me to install Chromium with apt-get, and it just didn’t work. But I found the following to work (as of this writing, August 2016):
wget https://dl.dropboxusercontent.com/u/87113035/chromium-browser-l10n_45.0.2454.85-0ubuntu0.15.04.1.1181_all.deb

wget https://dl.dropboxusercontent.com/u/87113035/chromium-browser_45.0.2454.85-0ubuntu0.15.04.1.1181_armhf.deb

wget https://dl.dropboxusercontent.com/u/87113035/chromium-codecs-ffmpeg-extra_45.0.2454.85-0ubuntu0.15.04.1.1181_armhf.deb

sudo dpkg -i chromium-codecs-ffmpeg-extra_45.0.2454.85–0ubuntu0.15.04.1.1181_armhf.deb

sudo dpkg -i chromium-browser-l10n_45.0.2454.85–0ubuntu0.15.04.1.1181_all.deb chromium-browser_45.0.2454.85–0ubuntu0.15.04.1.1181_armhf.deb
Not entirely sure why other methods didn’t work, but this did, and once I saw chromium-browser installed I didn’t ask questions. This took the longest, as I tried without avail to get iceweasel (which seems to be gone), and kweb, which worked but had some formatting issues. As you can imagine, it’s not the friendliest browser for cutting-edge front-end dev and kept making our site look weird. On to the next step!
Step 4: get some other stuff
In order to hide the cursor and disable the screensaver, people were recommending installing the following utils:
sudo apt-get install x11-xserver-utils unclutterOnce those install, we’re on to the next step.
Step 5: write a script to launch the browser after bootup
We’re going to modify the autostart file in .config/lxsession/LXDE-pi/, so navigate to it like this:
cd .config/lxsession/LXDE-pi/and then edit it with nano like so:
sudo nano autostartOnce you’re in there, add this line to the end to launch chromium in kiosk mode and incognito (so it doesn’t try to restart your session after you inevitably kill the power):
@chromium-browser — kiosk — incognito http://garbage-plate.herokuapp.comI’m telling it to go to GarbagePlate’s url, but you can point it anywhere. Also add these lines after that to turn off the screen saver and hide the cursor:
@xset s noblank
@xset s off
@xset -dpms
@unclutter -idle 0.1 -root
When the Pi was going to sleep, I also did this:
sudo nano /etc/lightdm/lightdm.confand modified the xserver-command line to read like this:
xserver-command= X -s 0 -dpmsStep 6: Let’s give it a go
Reboot it, sudo reboot, and see if it boots into chromium and loads the site you’re looking for. If so, you’re good to go and install it! If not, sorry my friend, you have more googling ahead.

Step 7: The install
I put some velcro on mine and stuck it behind a couple of the TV’s at Upstatement. Plugged the USB power cable into the TV’s USB jack, and the HDMI into an adjacent HDMI port. Now when we turn on the TV, the Pi will start up and serve our GarbagePlate to the office.
